
Custom fields
Custom fields let you keep your own details on customers, products, variants and orders, such as a product's warranty or whether a customer buys wholesale, with the right kind of input for each.
Adding a field
- Open Settings → Custom fields and click Add field under the kind of record it belongs to, then pick a type: text, a number, a whole number, yes or no, a date, a date and time, a web address, or a list of options to pick one or several from. A new card appears for the field.
- Type its name where the card says "Add a name...". That is what your team sees and what an error message uses, such as "Warranty months can be at most 60." Meisei fills in the key to the right of the name. The key can't be changed later, so set it now if a developer or your import files already use one. Help text goes on the line below the name.
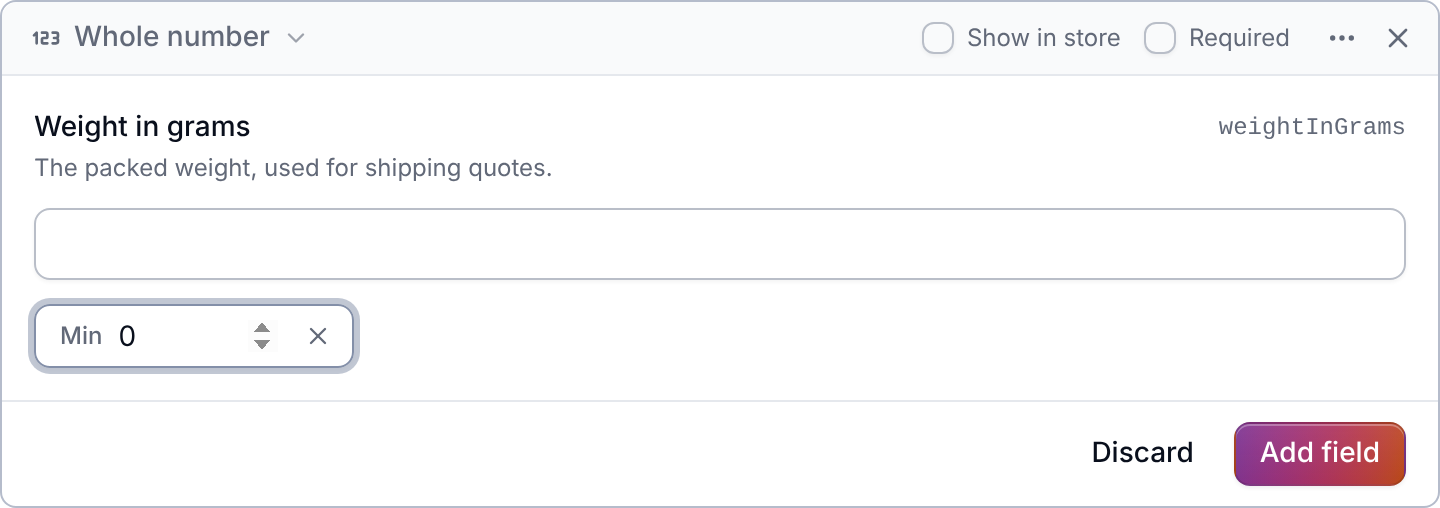
- The card shows the input a record will get, so you can try it out. For a list, type the
options on the card. To add a rule, open the ⋯ menu at the top of the card: a number
can have a Min and Max, and text can have a Max length or a Pattern. A
pattern can't repeat a group that repeats inside it, such as
(a+)+, because checking values against it could take too long. The cross beside a rule removes it. - Tick Required if new records have to fill it in, and Show in store if your theme should be able to display the value (see below). Then click Add field at the bottom of the card.
A yes or no field is a switch that reads as off until someone turns it on, so it can't be required.
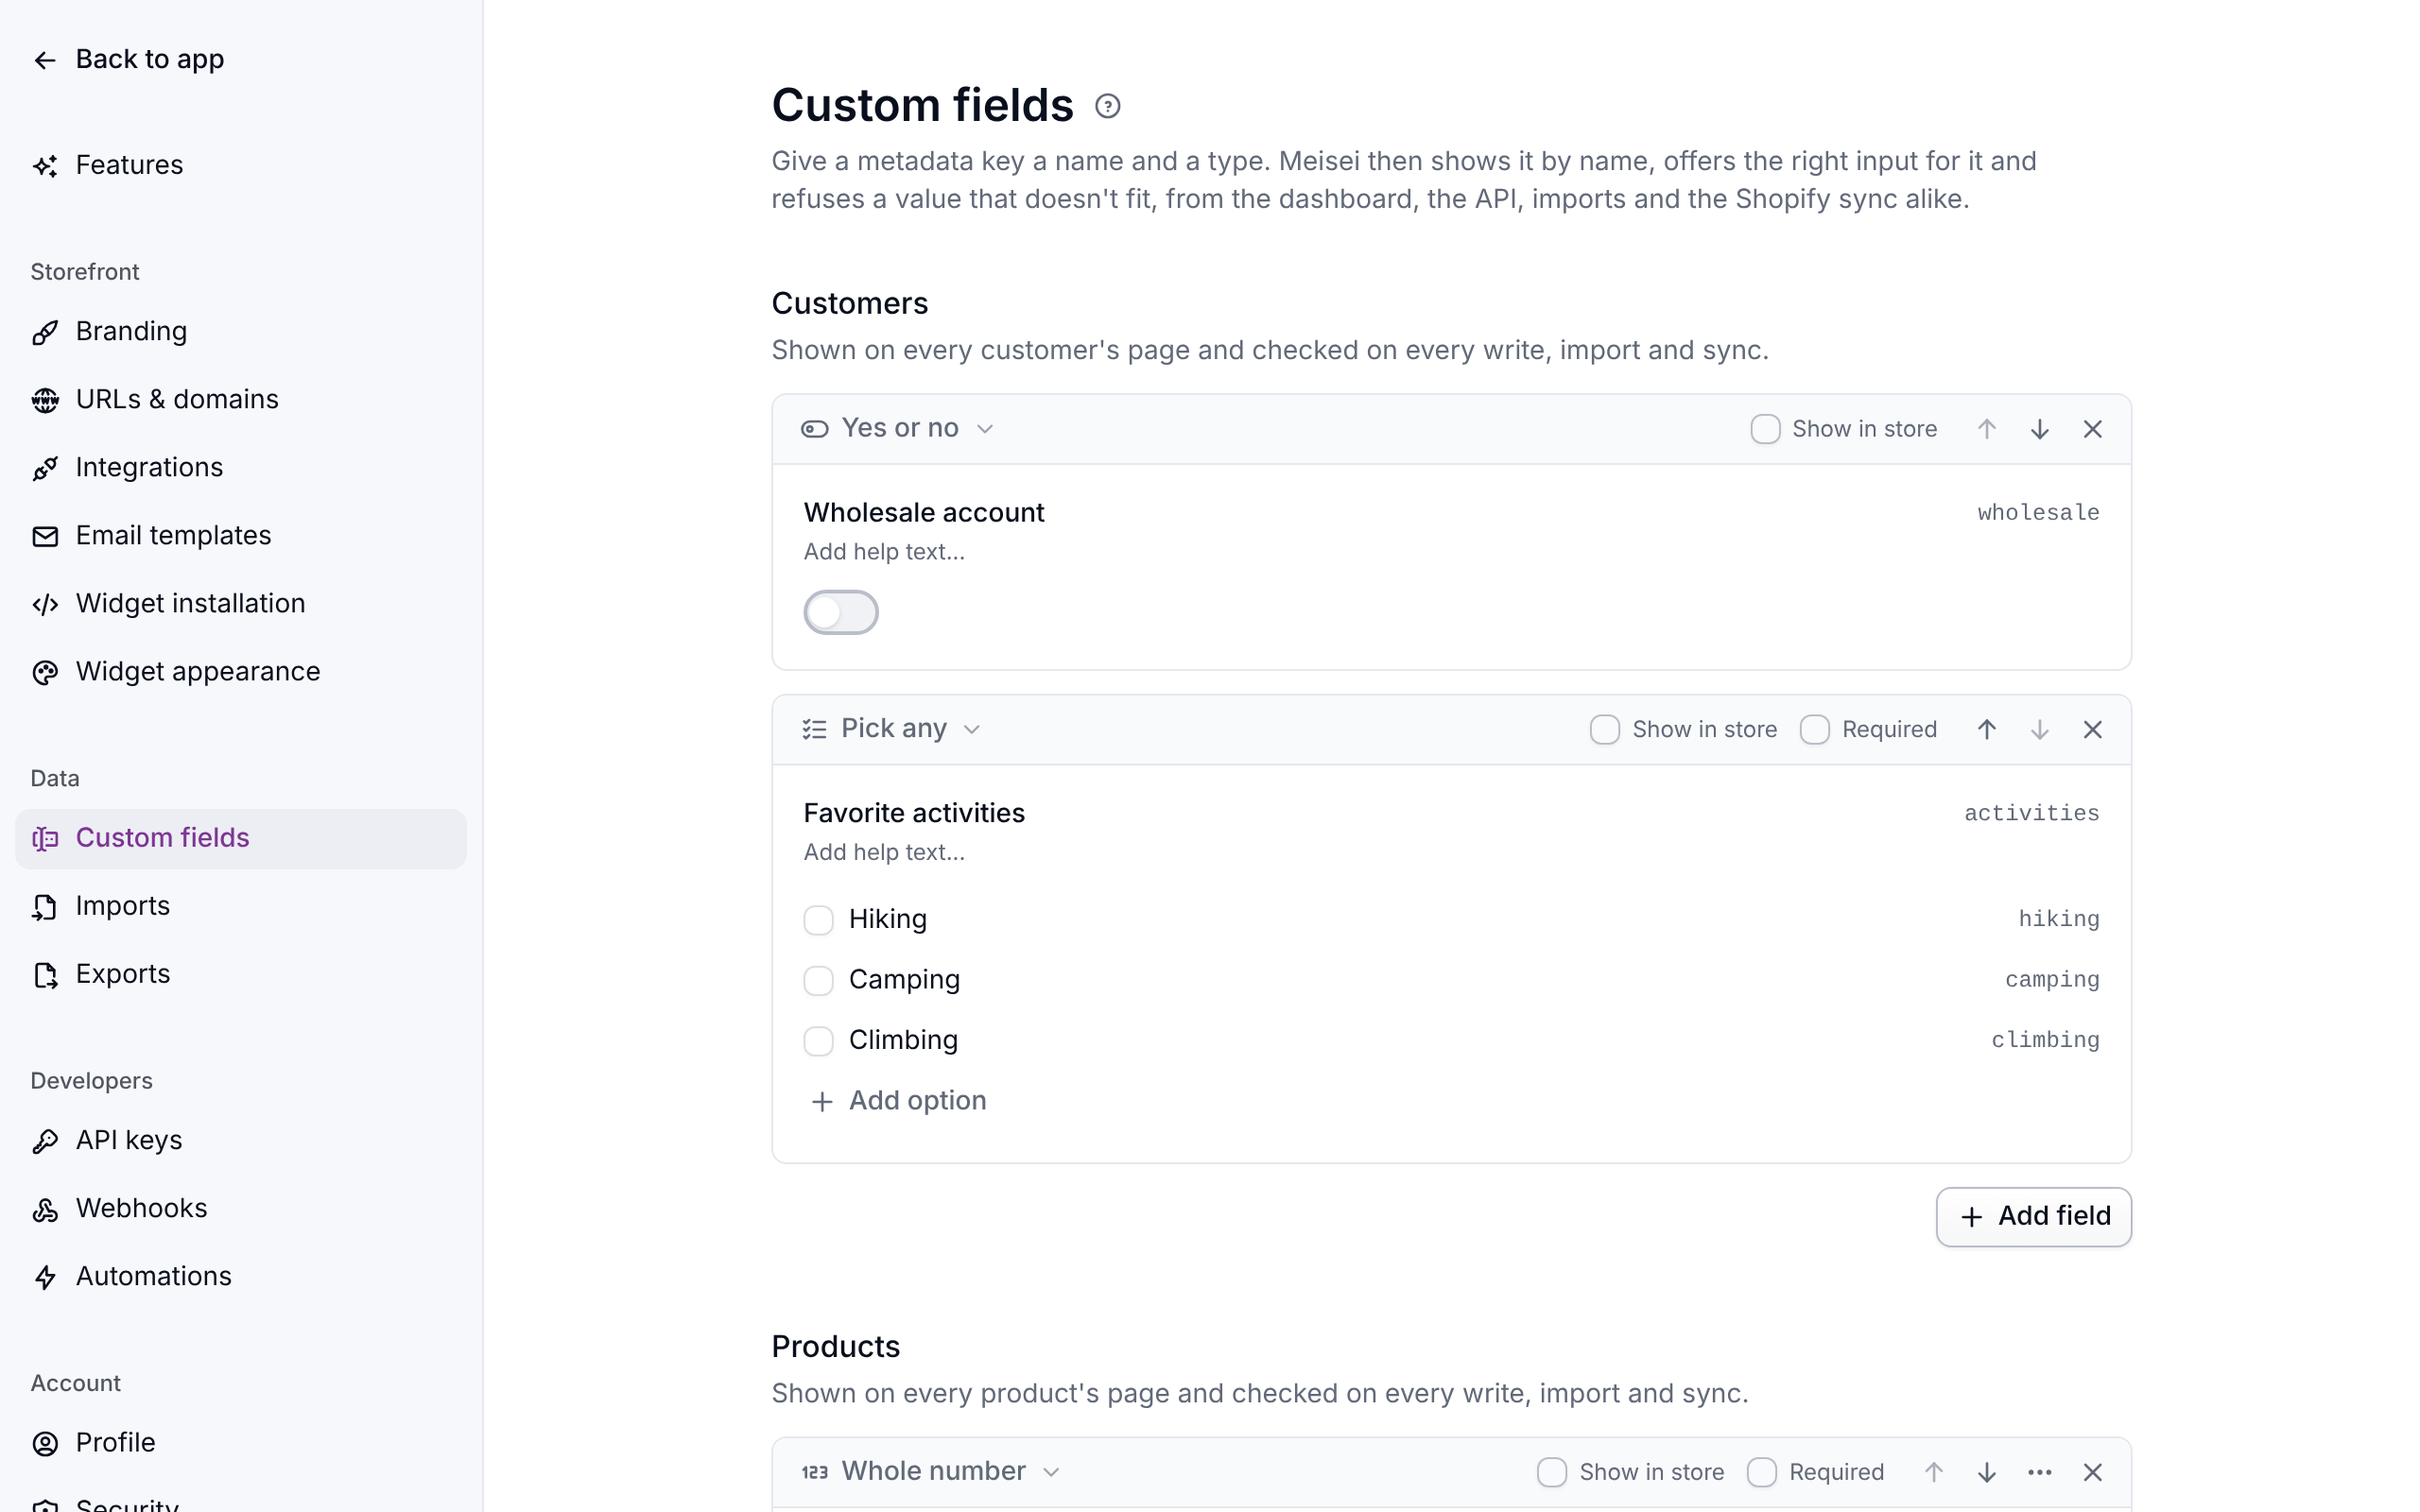
You can add up to 100 fields to each kind of record. To change one, edit it right on its card and click Save. The arrows at the top of a card change the order fields are shown in, and the cross deletes the field.
Filling in a field
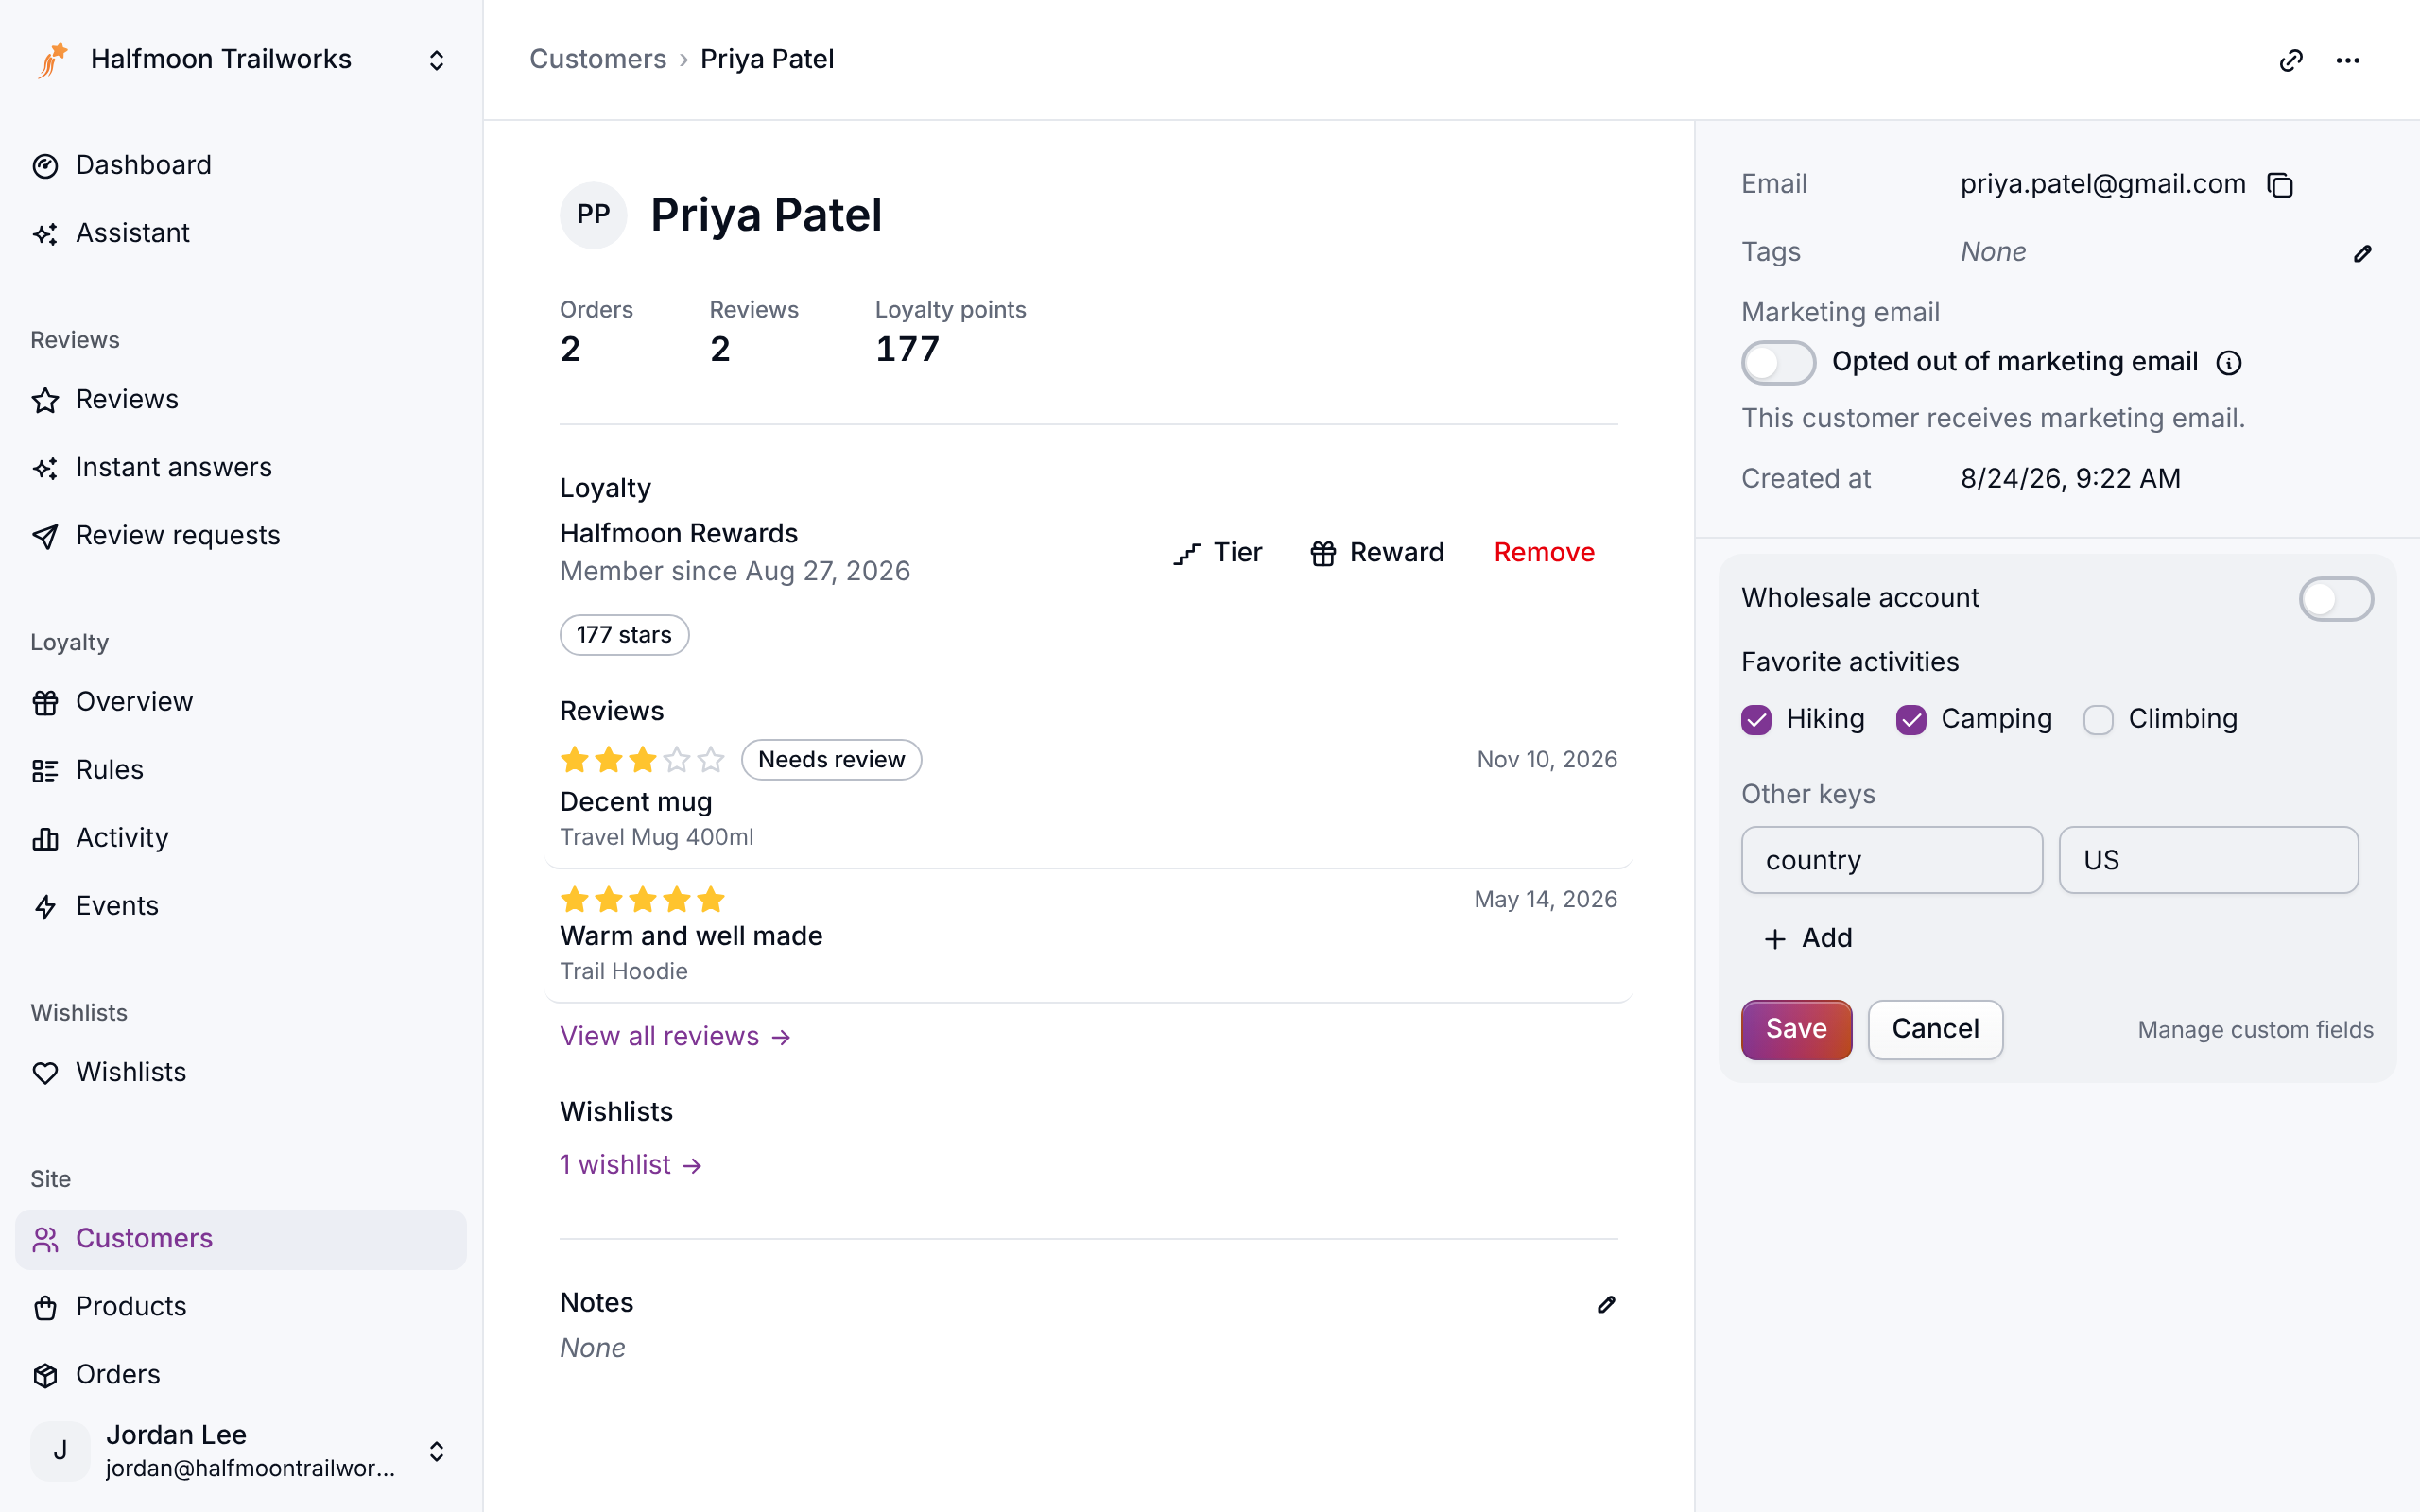
Open any customer, product (or one of its variants) or order. Its custom fields are listed with its other details, or "No metadata" when none are filled in. Click any of them to edit them all: each field has its own input, and any other details you keep are listed under "Other keys". A value that doesn't fit, such as a number above the highest one allowed, isn't saved, and a message says why.
The same check applies to imports and to your Shopify sync. A CSV import lists the rows it couldn't take and imports the rest. The Shopify sync converts a mapped metafield to the field's type (a choice metafield by its label, a list metafield into a pick any field), skips a value that doesn't fit and keeps what was there.
To fill in a field on many records at once, select them in the list and click Edit metadata. Each custom field has its own input there, and a field you leave empty stays as it is on every record.
Finding records by a field
- Search finds text. Type into the search box on the customers, products or orders list to look through text and web address fields, so searching "walnut" finds products whose finish note mentions walnut. Other fields, and metadata that isn't a custom field, aren't searched.
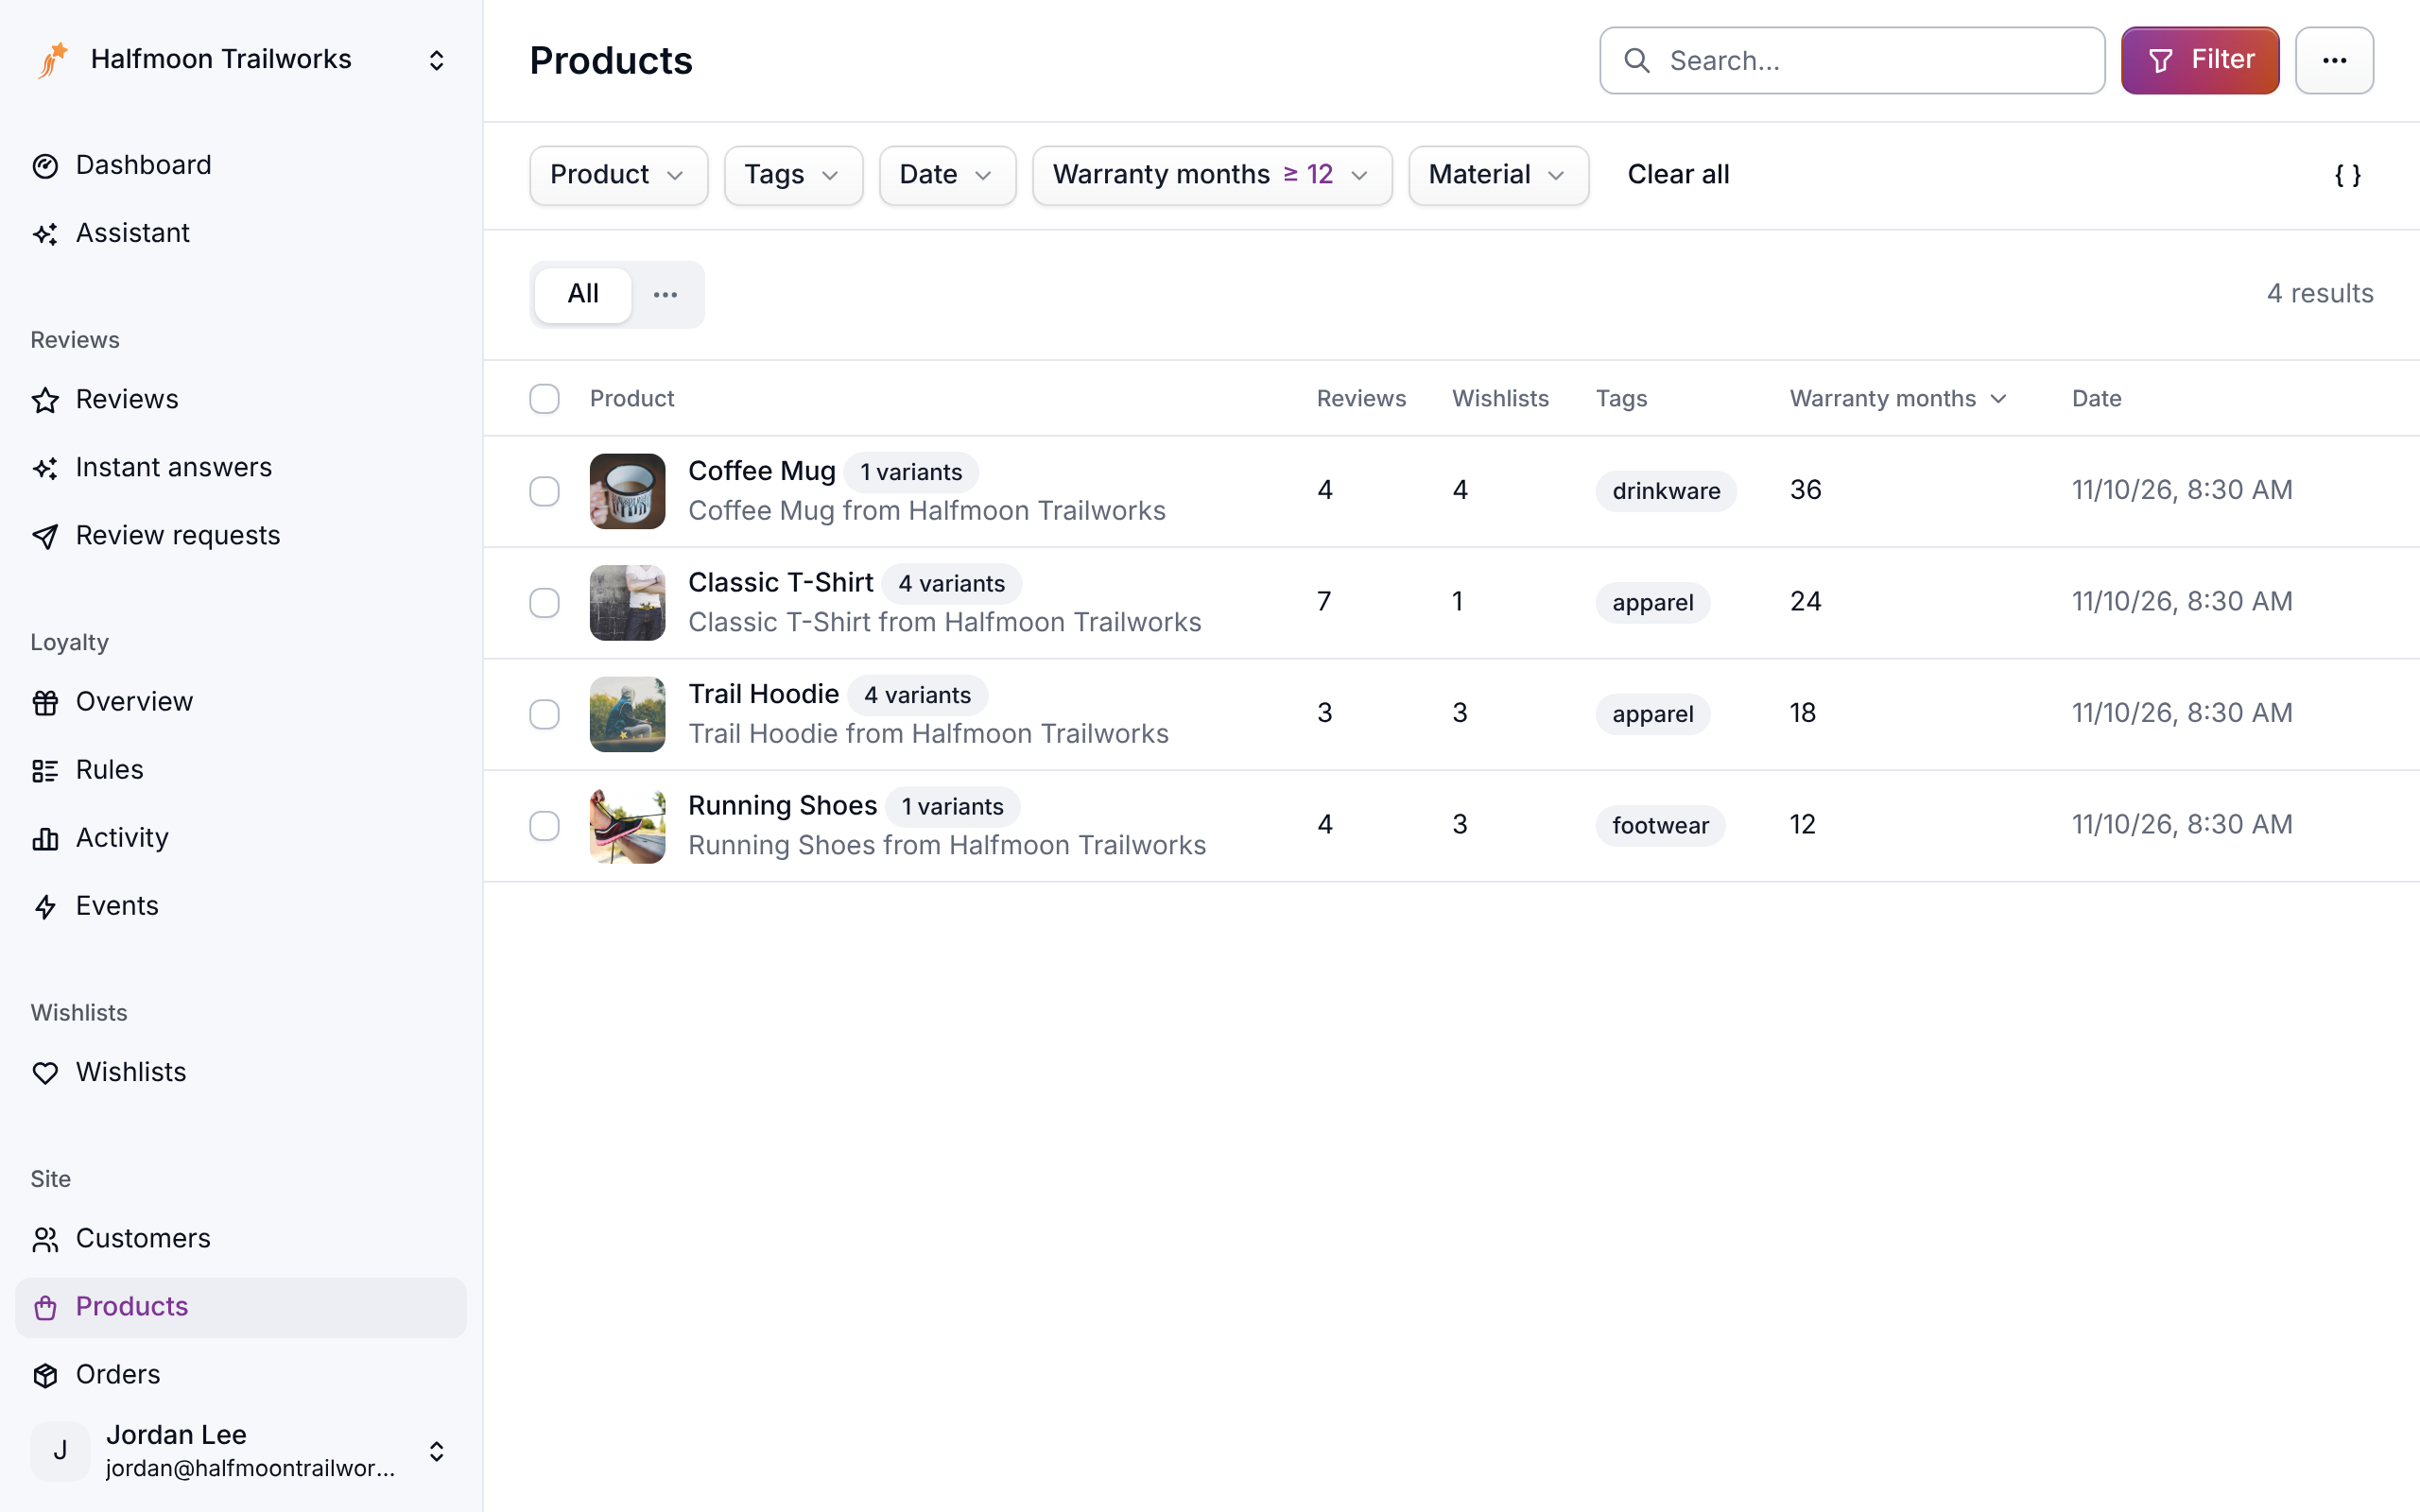
- Filter narrows by everything else. Open Filter and each number, date, yes or no and choice field has its own button beside the built-in ones: a range for numbers and dates, Yes or No, or the options to pick from. A pick any field finds records that have any of the options you choose. Text fields have no button, since search covers them.
- Sort. Open the list's ⋯ menu and choose Sort by field. The field's column appears in the list, and clicking its heading flips the order. Records without a value come last. A pick any field can't be sorted by.
Showing a field in your store
Custom fields are private by default. Tick Show in store for a product, variant or customer field and its value is included in what the storefront widgets load: the product's rating summary, each wishlist item's product and variant, and the signed-in member's loyalty details. Order fields never reach your store.
Changing or deleting a field
- Changing a field's type converts every saved value that fits the new type, such as "12" to the number 12, in the background. A value that doesn't fit is left as it is, and Settings shows how many records still hold one under the field. Each is checked again the next time someone saves that record.
- Making a field required only applies going forward. Records from before can still be edited without it.
- Deleting a field keeps every saved value. It stops being checked, and shows under "Other keys".
For developers
A custom field is a metadata definition: it gives one key of a record's metadata a type,
and Meisei stores a defined value as a real number, true or false, or list. Create one with
POST /metadata-definitions:
- A write that sends a value its field doesn't allow is refused with a 400 naming the field.
"12"sent to anintegerfield is stored as12, and"true"astrue. GET /metadata-definitions?filter={"resource":"products"}lists a store's fields, since the API reference describesmetadatathe same way for every store.- A defined key filters with the operators its type allows, such as
{"metadata.warrantyMonths":{"$gte":12}}or{"metadata.woods":{"$includes":["oak"]}}, and sorts withsort=-metadata.warrantyMonths. Anything else is a 400 that says what the field takes. GET /metadata-definitions/:idincludesnonConformingCount, the number of records whose value the field can't read.- A field with
storefront: trueappears in themetadataof the widget responses above. - Keys Meisei writes itself, such as a Shopify variant's
shopifySku, can't be defined. - Changes need
settings:write, are recorded in the audit log, and are sent asmetadataDefinition.created,.updatedor.deletedwebhooks.
Next steps
- Filtering lists, including by a custom field.
- Importing products, with field values in the metadata column.
- The metadata definitions reference.