
Connecting Shopify
Install the Meisei app on your Shopify store and your products, customers and orders sync on their own, loyalty rewards work as real discount codes, and the widgets go into your theme with a click.
Install the app
- Install the Meisei app from the Shopify App Store and approve the permissions Shopify shows you. Meisei opens in your Shopify admin.
- Choose how to set it up:
- New to Meisei? Press Create my account. Meisei makes your account with the email address you use for Shopify, names it after your store and starts your free trial. Shopify has to have confirmed that address first.
- Already use Meisei? Press Connect my account, sign in, and choose which Meisei account the store joins. You come straight back to Shopify.
Either way the store connects in a few seconds and your existing products, customers and orders start importing. To use the full Meisei app later, sign in with the same email address; Meisei sends you a sign-in link. Watch the progress under Settings → Imports. A big catalog takes a while. Reviews and loyalty attach to products, so let the import finish before you set up flows.
During the free trial the first import brings in the last 90 days: your most recently updated products, plus the customers and orders from those 90 days, up to 5,000 of each. Meisei imports everything older within an hour of your first payment.
If you run several shops, connect each to the same account. They arrive as separate stores; see Running more than one store.
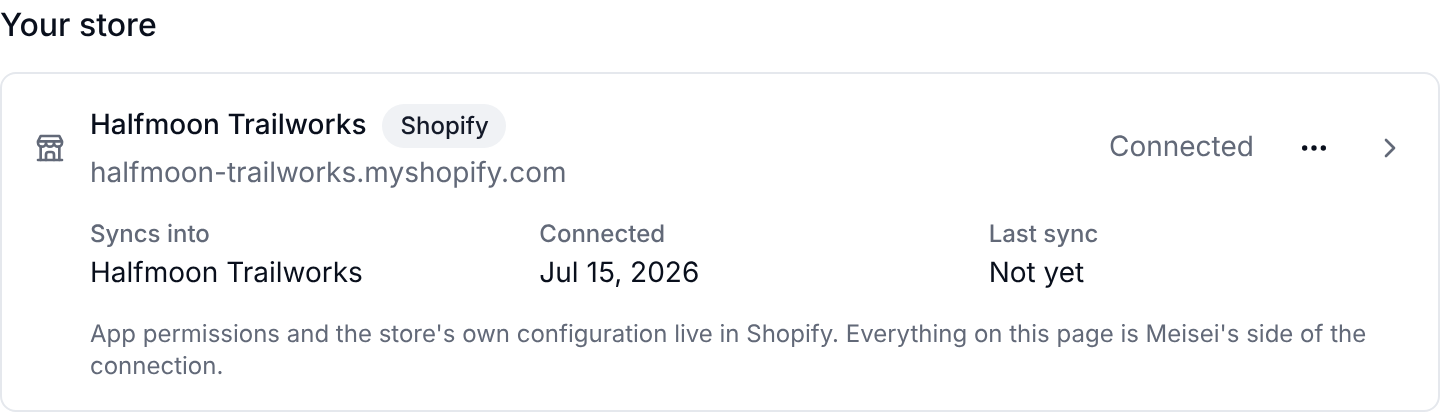
The Meisei app in your Shopify admin
Open Meisei from Apps in your Shopify admin to check on your store without leaving Shopify. It has four pages:
- Home says whether Meisei is working on your store. Until it is, a short checklist walks you through what's left. Once it is, you see the last 30 days of reviews, loyalty and wishlists, and a warning if something needs you, like Meisei switched off in your theme.
- Storefront shows which widgets are in your theme and adds the missing ones (see Widgets in your theme).
- Plan is where you choose a plan and see this month's usage. See Billing.
- Settings shows the connection, starts a full sync again, and holds the few sync settings most stores never change.
Open Meisei takes you to the full app in a new tab. Sign in there if Meisei asks.
What stays in sync
After the first import, changes in Shopify arrive on their own: product and variant edits, customer changes, and orders as they're placed, paid and fulfilled.
A few things to know:
- Meisei recognizes products, variants and customers by their Shopify IDs, which it keeps per store. Renaming a handle in Shopify renames the product in Meisei too, unless you turn that off (see Product handle renames), and a customer who changes their email stays the same customer.
- A customer who unsubscribes in Shopify is opted out in Meisei. Meisei never writes its own opt-outs back to Shopify.
- A product's Vendor becomes its brand in Meisei, and a variant's Barcode its GTIN when it is a real UPC or EAN. They're what Google Shopping matches your reviews by. A barcode that isn't one, such as an internal stock code, is left out.
Reading Shopify metafields into Meisei
If your store keeps useful details in metafields (a product's material, a customer's lifecycle stage, an order's gift message), you can bring them across.
-
Open Settings → Integrations and click your store to open its sync settings.
-
Under Metafields synced in, add a mapping: choose products, customers or orders, enter the metafield's namespace and key, and choose the name it's saved under in Meisei.
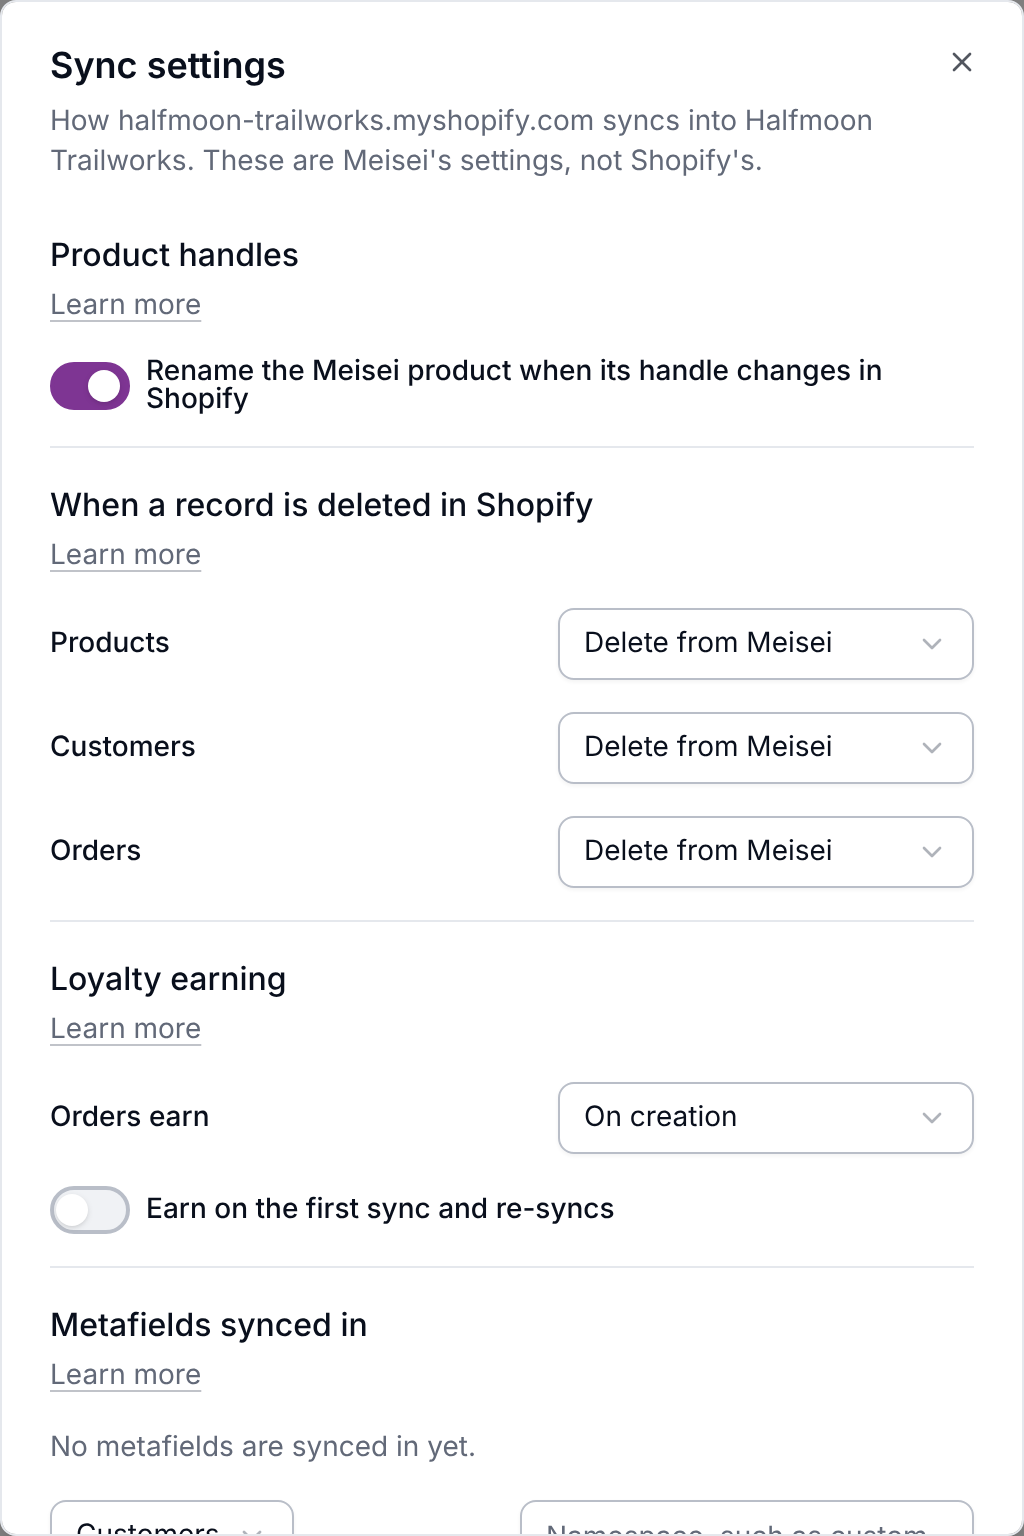
From then on the values come across with every sync and show up on the product, customer or order, in filters and in exports. Removing a mapping stops future updates but leaves the last synced value in place.
Product handle renames
A product's handle is the last part of its URL, like navy-merino-crew. When you rename one
in Shopify, Meisei renames its product to match, so the reviews, wishlists and orders on it
stay where they are.
If you'd rather Meisei kept the old handle, turn off Rename the Meisei product when its handle changes in Shopify in your store's sync settings under Settings → Integrations. It stays the same product either way, because Meisei knows it by its Shopify ID, and the app's theme blocks find it by that ID too.
Either way, a handle that another Meisei product already uses is never taken over, and the product keeps its old handle in Meisei.
Several stores in one organization
You can connect more than one Shopify store, each as its own site. A product with the same handle in two stores is one Meisei product with both stores' IDs, so the two stores share its reviews and wishlists. Meisei keeps each store's IDs separate, so a sync from one store never changes the other.
Deletion settings
When a product, customer or order is deleted in Shopify, you decide what happens in Meisei. Each has its own setting under Settings → Integrations:
- Delete from Meisei removes it. This is the default.
- Keep in Meisei keeps it and stops it syncing from this store.
Deleting a product or customer unpublishes its reviews rather than deleting them. To delete the reviews too, turn on Delete reviews with their product or customer under Settings → Features → Reviews. Meisei always honors Shopify's customer redaction requests in full.
Loyalty earning from synced orders
Two settings in your store's sync settings under Settings → Integrations decide when a synced order earns loyalty rewards:
- Orders earn chooses whether an order earns as soon as it arrives or only once Shopify reports it paid.
- Earn on the first sync and re-syncs is off by default, so importing years of order history doesn't hand out years of points.
On a connected store, a reward a member claims becomes a real Shopify discount code that works at checkout. Members can also see their balance and redeem at checkout; see Loyalty at Shopify checkout.
Widgets in your theme
- Open the Meisei app inside your Shopify admin and go to Storefront. It reads your live theme and shows which widgets you already have, which are switched off, and which are missing. It lists the widgets for what you run; the rest are one click away.
- Turn on the Meisei embed first. It loads everything else and carries the settings that apply everywhere, including the floating rewards button.
- Press Add beside each widget you want. Your theme editor opens with the block already placed; drag it where you want it and press Save. Nothing edits your theme until you save.
Star ratings and the points balance load with the page, because Shopify draws them from what Meisei keeps on your products and customers. A collection page full of stars loads as fast as it did without them. They update within moments of a new review or a change in points. Your colors and custom CSS from Widget appearance reach your store the same way, a minute or so after you save.
To let an AI assistant in a shopper's browser use the widgets, check Let AI agents use the widgets in the Meisei embed's settings. See AI agents on your storefront.
Signed-in shoppers see their own wishlists, points and rewards without any extra setup. Shoppers who aren't signed in see ratings, reviews and the program, plus your store's usual sign-in prompt.
If Meisei asks for theme access, grant it. Stores connected before this feature need this read-only permission, and it takes one click. If your theme is older than Online Store 2.0, the card offers Add by hand instead with the code to paste into your theme. See Storefront widgets for what each widget does.
Paying and disconnecting
If you installed from the Shopify app store, Shopify bills you and the plan appears on your Shopify invoice. See Billing.
Disconnecting (under Settings in the Meisei app in Shopify), or uninstalling the app, stops the sync but keeps everything in Meisei. Reconnecting the same shop picks up where it left off.
If something isn't syncing
- The first import hasn't finished or shows errors. Check Settings → Imports.
- The store shows as disconnected. Check Settings → Integrations.
- One product or order is missing. A product with no handle, or an order for a product Meisei has never seen, is skipped and reported rather than guessed at.
- You can't connect another store. You may be at your plan's store limit. See Plans and limits.
Next steps
- Collecting reviews once your orders are in.
- Loyalty to set up points and rewards.
- Loyalty at Shopify checkout.
- Automating with Shopify Flow to wire reviews and loyalty together.
For developers
Sync matching, Shopify IDs in the API, and the ratings and loyalty metafields your theme can read are in Shopify themes and metafields.