
Custom integration
This guide is for a developer connecting a store that is not on Shopify. It walks through
the whole integration in the order you would build it, and everything here is implemented in
packages/example-custom-store, a working shop you can run and read.
If you are on Shopify, install the app instead and skip all of this. See Connecting Shopify.
What you are building
Meisei needs to know about your catalog, your customers and your orders. In return it runs reviews, loyalty and wishlists, renders the customer-facing pieces on your storefront, and tells your systems when something happens.
There are four pieces of work, none of them large:
- Push products, customers and orders in, and keep pushing as they change.
- Put the widgets on your storefront, signing in the shopper who is logged in.
- Honor a loyalty reward code at checkout.
- Receive webhooks so your systems hear what Meisei did.
Before you start
- A site in Meisei representing this storefront. Create it under Settings → Branding, or over the API as the example does on first run. Everything else names it by slug.
- A secret key from Settings → API keys with the permissions you need:
products:write,customers:write,orders:write,loyalty:read,loyalty:write,webhooks:write, and read on anything you want to pull back. See Authentication. - A publishable key and the widget signing secret, both from the same page, for the storefront half.
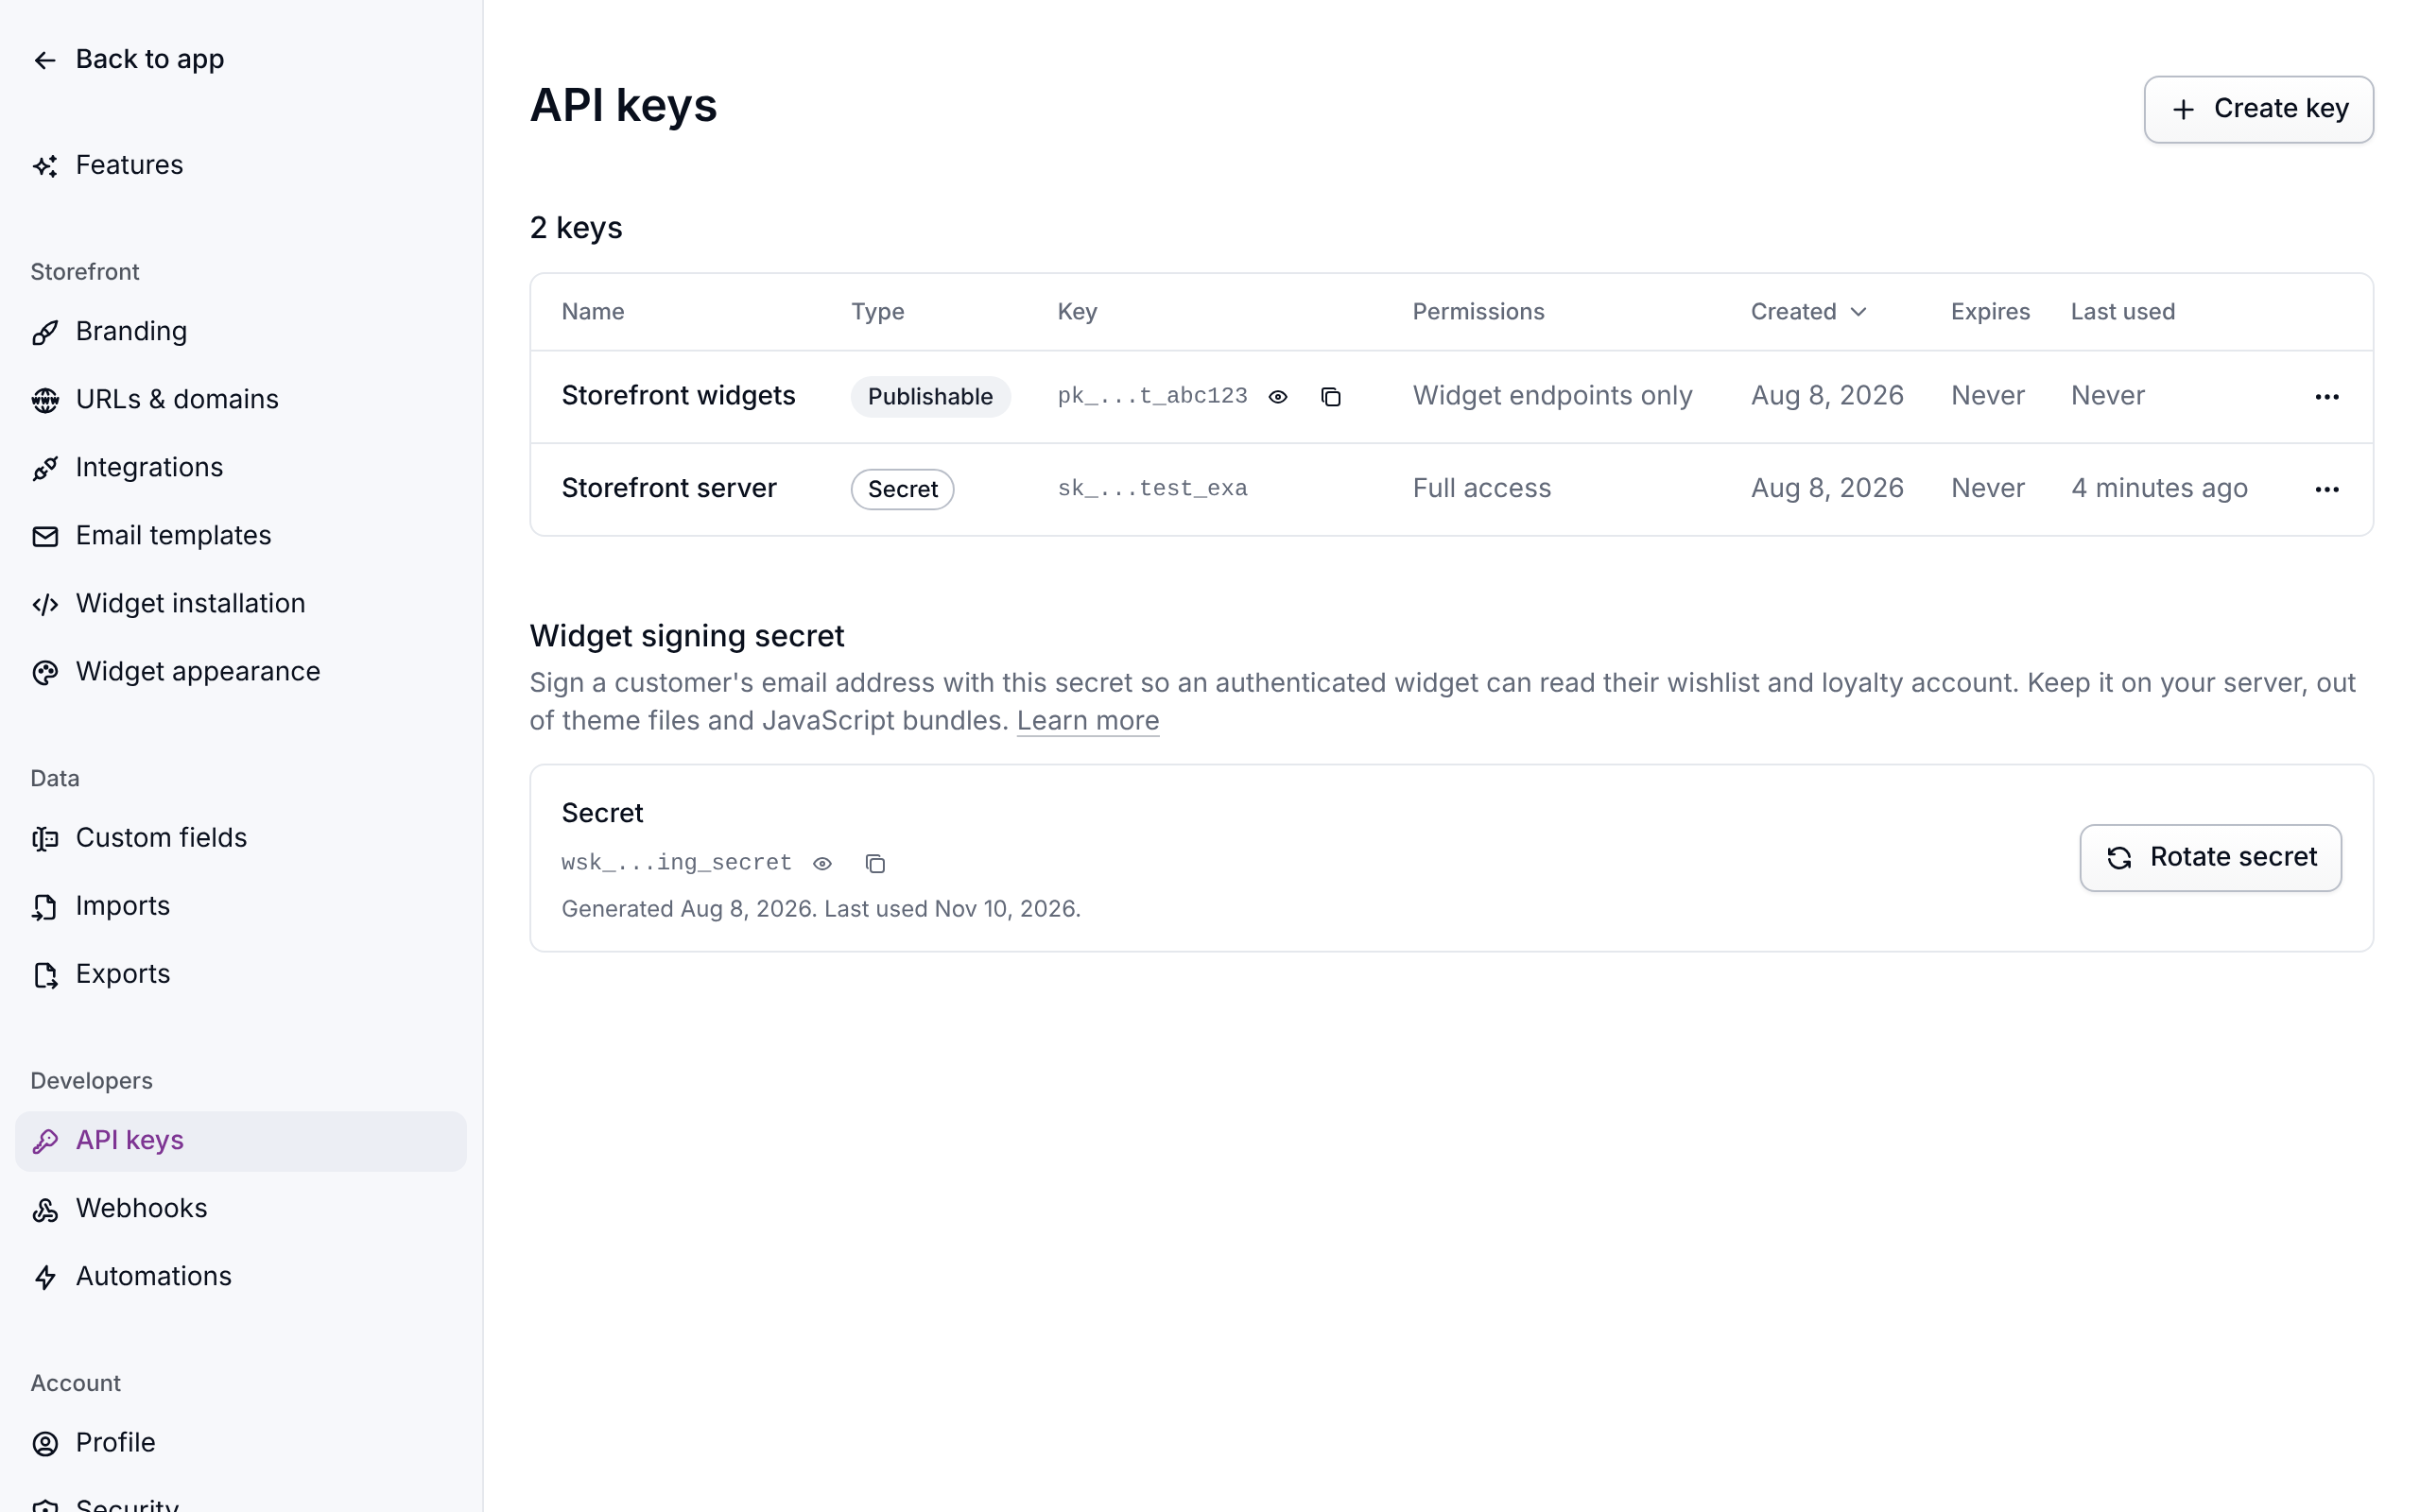
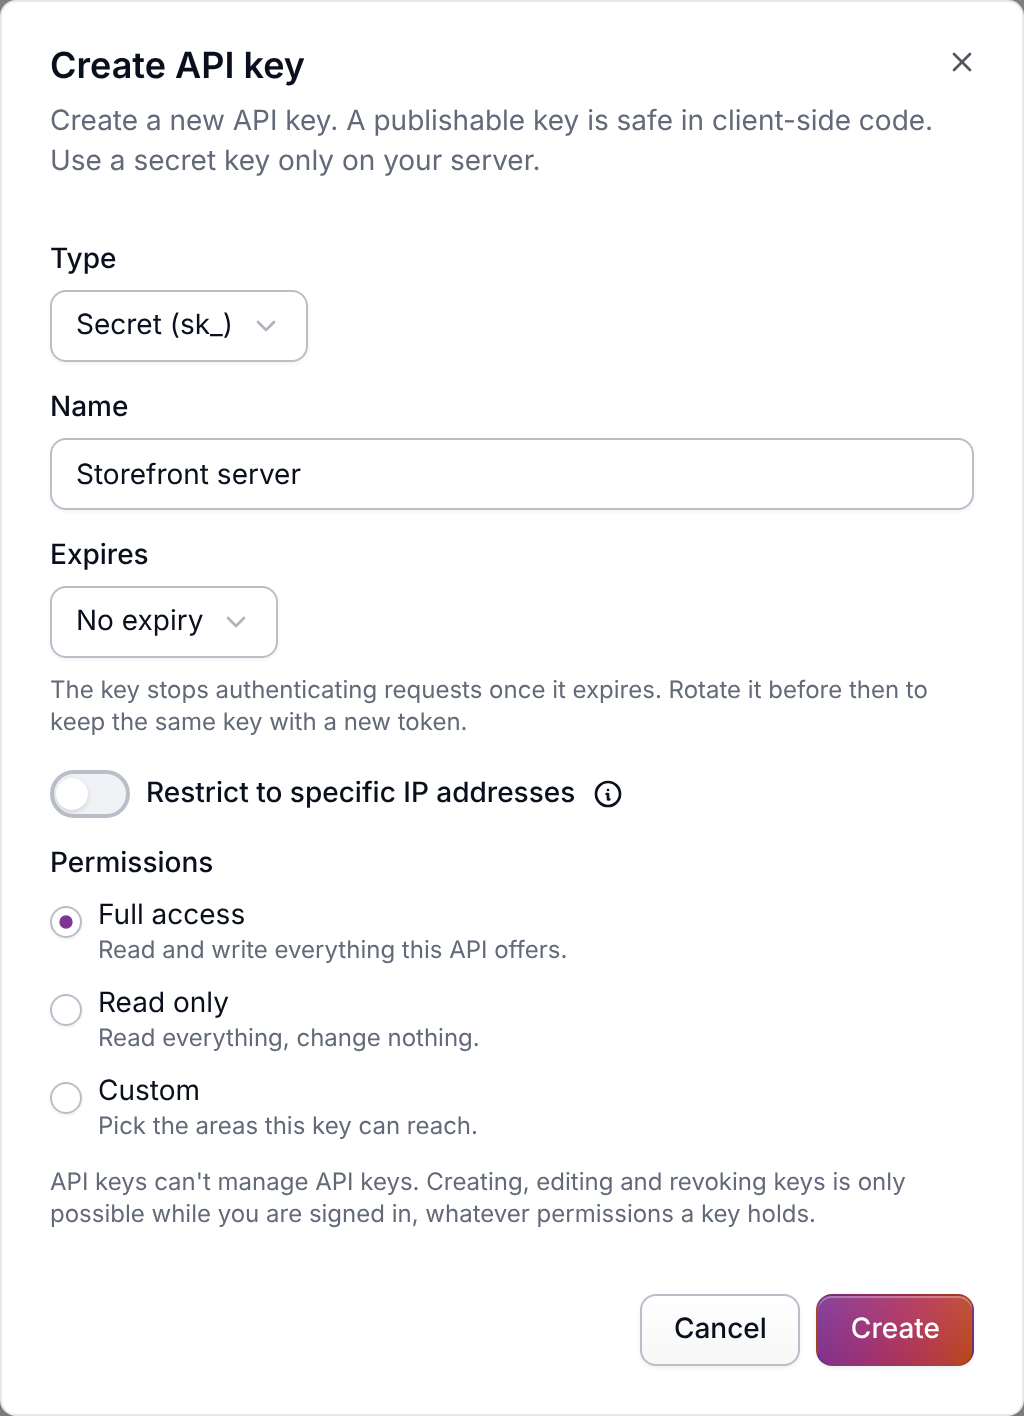
The secret key belongs on your server. If it can be read from a browser, anyone can read and change everything in your organization.
1. Getting your records in
Use the import endpoints. They create or update, matching on a natural key, so one code path covers your first backfill and a single record changing later:
externalId is optional. It is the record's ID in your own system. Send it and Meisei finds the
record by that ID first, so a product whose slug changes, or a customer whose email changes,
updates the same record rather than creating a second one. If you sell through more than one
site and the same record has a different ID on each, send externalIds instead, a list of
{ site, id } pairs.
Every column you send overwrites what is stored, so send complete records rather than
partial ones. A column you leave out stores nothing under it, except for variants and
items. Leave one of those out and whatever is stored stays, so an update that changes a
title cannot wipe a product's variants. Send null to replace it with
nothing. A product carries its variants:
Order matters: products, then customers, then orders. An order references products by slug and a customer by email, and a row naming something Meisei has not seen is skipped and reported rather than guessed at.
Backfilled orders must not earn points
POST /orders/import takes an earnLoyalty flag. Send false for history:
Your existing order history is not new business. Import it with the default and every past order runs through your loyalty rules, handing out points and reward emails for purchases made years ago. A live checkout sends the default, which earns.
If members already have balances in another system, import those separately rather than trying to reconstruct them from orders. See Migrating from another loyalty app.
Keeping in sync
Push on write. When a product is saved in your own admin, import that one product; when an
order ships, import that one order with its new shippedAt. It is the same endpoint with
one record in the array.
Deletion takes your ID too. If you sent externalId, delete the record with it, since
GET, PATCH and DELETE on /products/{id} and /customers/{id} all accept your ID as
well as Meisei's:
2. Widgets on your storefront
One script tag renders the ratings, review list, review form, loyalty page and wishlist manager. It takes your publishable key, which is safe in page source.
For anything belonging to one shopper (their wishlists, their loyalty balance), the page also carries an email address signed on your server, which proves the shopper is who the page says. The recipe is an HMAC-SHA256 of the email and a Unix timestamp, keyed with your widget signing secret:
The signing secret is not publishable. Anyone holding it can sign as any of your customers, so keep it out of theme files and JavaScript bundles. Full details, the attributes, and examples in other languages are in Storefront widgets.
3. Rewards at checkout
A member claims a reward in the loyalty widget and gets a code. Your checkout has to recognize it, price it, and mark it used. There are three steps, in this order:
Look the code up. GET /loyalty-rewards/lookup?code=... says what the code is, what
it is worth, whether it is still pending, when it expires, and any minimum order total.
Work out the money yourself. Meisei tracks the reward, and your checkout prices the basket. Map the reward type to your own discount:
Check the code is usable before applying it: the status has to be pending, expiresAt
has to be in the future, and minimumOrderTotalCents has to be met.
Redeem it as the shopper places the order. POST /loyalty-rewards/{id}/redeem marks the
code used so it cannot be spent twice. Call it when the shopper confirms, before you write
the order, and stop the checkout if it is refused. Two checkouts using the same code at
once both pass the lookup, and only the redeem tells them apart. Don't redeem while the
shopper is still editing their cart.
Then import the order as usual. That is what earns points on the purchase and starts the clock on the review request.
4. Receiving webhooks
Register an endpoint and verify every delivery against the raw body before parsing it. See Webhooks for the envelope, the signature recipe and the full event list.
Subscribe to what you handle. A storefront usually wants review.created and
review.updated (to keep its own cache of published reviews), loyaltyReward.issued and
loyaltyReward.redeemed, loyaltyMembership.created, and wishlist.updated.
Telling Meisei about things it cannot see
Some of what a loyalty rule should reward never touches an order: a shopper completed a
profile, attended an event, scanned a card in a physical store. POST /loyalty-events
takes an event name such as profile.completed, the customer, and optionally a value and a
flat object of properties.
Every rule whose trigger listens for that name decides what the customer earns. It can require conditions on the properties, pay out on every tenth event like a punch card, or cap itself per day, week or month. Meisei keeps the event even when no rule listens for it yet, so you can start sending before the merchant writes the rules. See Custom loyalty events.
The worked example
packages/example-custom-store is a complete fake shop, running on :3070 alongside the
rest of the repo, that integrates through the public API alone. It has a storefront with
every widget, an admin that pushes records, a checkout that honors a reward code, and a
webhook receiver, and it holds everything in memory so a restart clears it.
On boot it creates its site, registers its webhook, and pushes its products, customers and
orders. Its /admin page shows the connection status and a
two-way log of everything sent and received, which is the fastest way to see a broken
integration.
server/meisei.ts holds the entire integration, and reading it top to bottom is the point
of the package. Everything else in the package is the shop itself. The other three files worth
opening are server/session.ts (signing the three widget auth parameters), server/checkout.ts (the
reward math above) and server/webhook-receiver.ts (verifying against the raw body).
It is built on @meisei/api, the published TypeScript client, rather than
hand-rolled fetch. See TypeScript client, or
Ruby client for a Ruby backend, or
Python client for a Python one.